

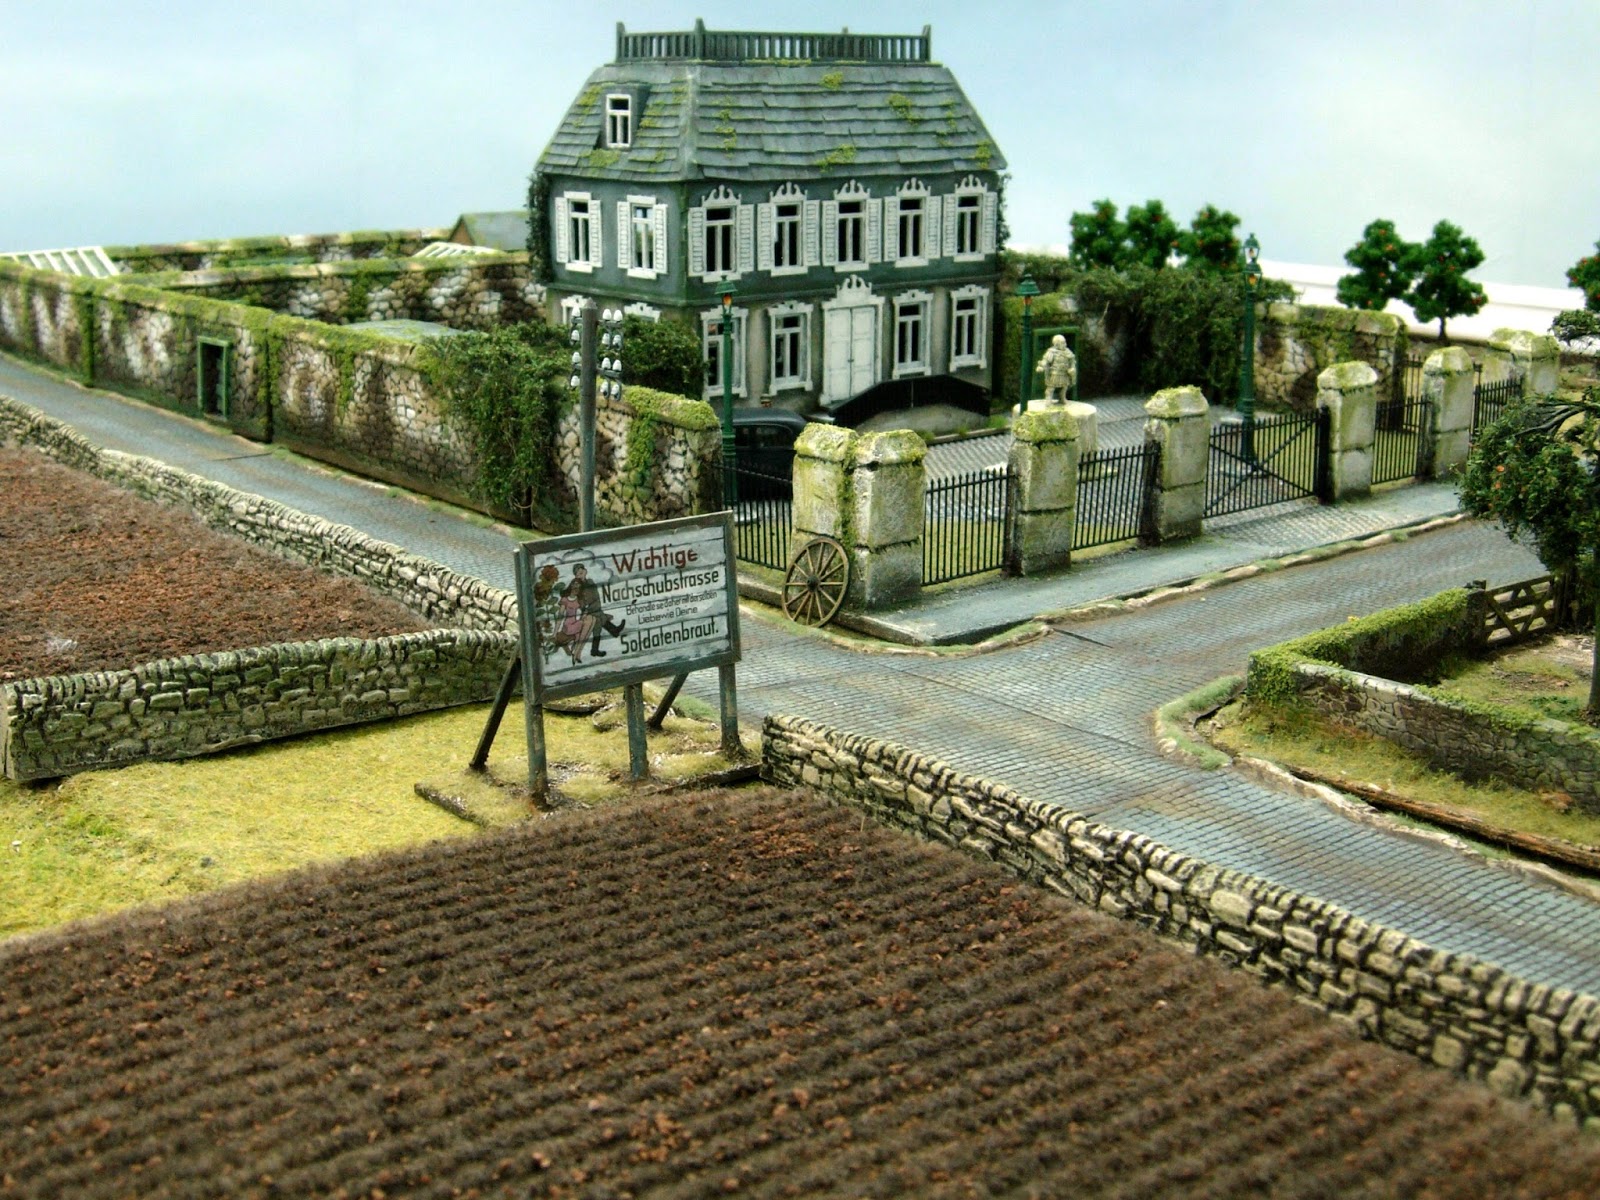
I assembled and painted the excellent laser cut Chateau from Sarissa Precision a while ago but wanted to finish it off by setting it in its own grounds.
As it was going to cover quite a large area 16" x 32", I have made it in sections to prevent warping and also to make it easier to store. There are four bases measuring 16" x 8", I originally cut five to make a stables as well but as this building didn't turn up in time, I have just made the four for now.

For the base I used 3mm hardboard. If cutting this indoors you can use a Stanley knife and ruler, rather than a jig saw to keep the sawdust down.
As you can see in the picture below, I originally cut five bases. I used the wood rasp just to tidy up any edges. When using the base keep the smooth edge facing up, as this is less absorbent and will help to prevent warping.

I then cut my walls from 2inch thick pink insulation foam that you can buy very cheap from the big hardware stores. Make sure you keep a sharp blade just for cutting this.(I change the blade over when cutting the hardboard)

Depending on what type of walling you are after, you can inscribe the brickwork into the foam with the tip of a biro.

Measure and mark out where you want your walling and then glue your walling onto the base with white glue. I use wood glue for this.

I also made an additional out building which has been built into the wall. The roof for this has just been made from a piece of card, covered in tissue paper and then painted over with white glue, which will dry hard and represent a flat felt roof. I haven't scribed brickwork into these walls as they will be covered in tile grout.

I will be using these excellent laser cut garden kits, spread around the grounds of the chateau. They are a joint effort made by TOO FAT LARDIES and WARBASES.

All the gates have been made so that they can be opened and closed, to improve playability in skirmish games, along with removal of the flat roof. I have made the gates using balsa wood and card. Matchsticks for the doorframes.


My friend Dave Green kindly gave me some wall paper, which is perfect for cobbled stone and much cheaper than using plastic card to get a similar effect, thanks Dave.
This was cut with scissors to the desired shape and then fixed to the board with white glue.

To blend the edges of the cobbled wallpaper in with the rest of the groundwork and also to give the groundwork some texture, I used Tile Grout. As I have mentioned in previous posts, I think this is better than using plaster, as I find it dries a lot harder and less likely to cheap off like plaster will.


I then mix up a little tile grout with some white glue and water and cover the pink foam walls with this to give it strength and texture. I also used this on the statue. This was a 28mm Wargames Foundry Imperial Roman figure that I had, that I thought would make a suitable statue. He was glued onto a plastic lid and a flat piece of plastic card and then the whole thing covered in a tile grout wash.

Everything is then covered in the usual brown Sandtex Masonry paint. I also used this for some door carpet fields that I had, that you can see in the background, along with some other bits of scenery that I had been making.


When dry, I then paint grey and mid brown masonry paint where appropriate.


Followed by Mid Stone masonry paint.


The wooden gates I have used Foundry Forest Green 28B and C.

Next up, a cream colour to highlight. (There is a very long and high stone garden wall near where I work which has a variety of shades and colours which I have tried to copy).


Use this colour also on the statue.

Then I have used Foundry Phlegm Green to try and give an impression of moss.


Static grass glued where appropriate.

I wanted the walls to have some plants growing over them so I thought I would try using rubberised horsehair. Cut into thin strips, spray dark brown or black and then hot glue to your walls. Once this is done, dab some white glue onto the rubberised hair and cover in suitable tree foliage.


I also had a box of plastic 1/48 road signs, lamp posts, gas lamps and a laser cut cart that I was working on at the same time as this project.

Here is the TFL Garden sets finished.


And some pictures of the finished piece.


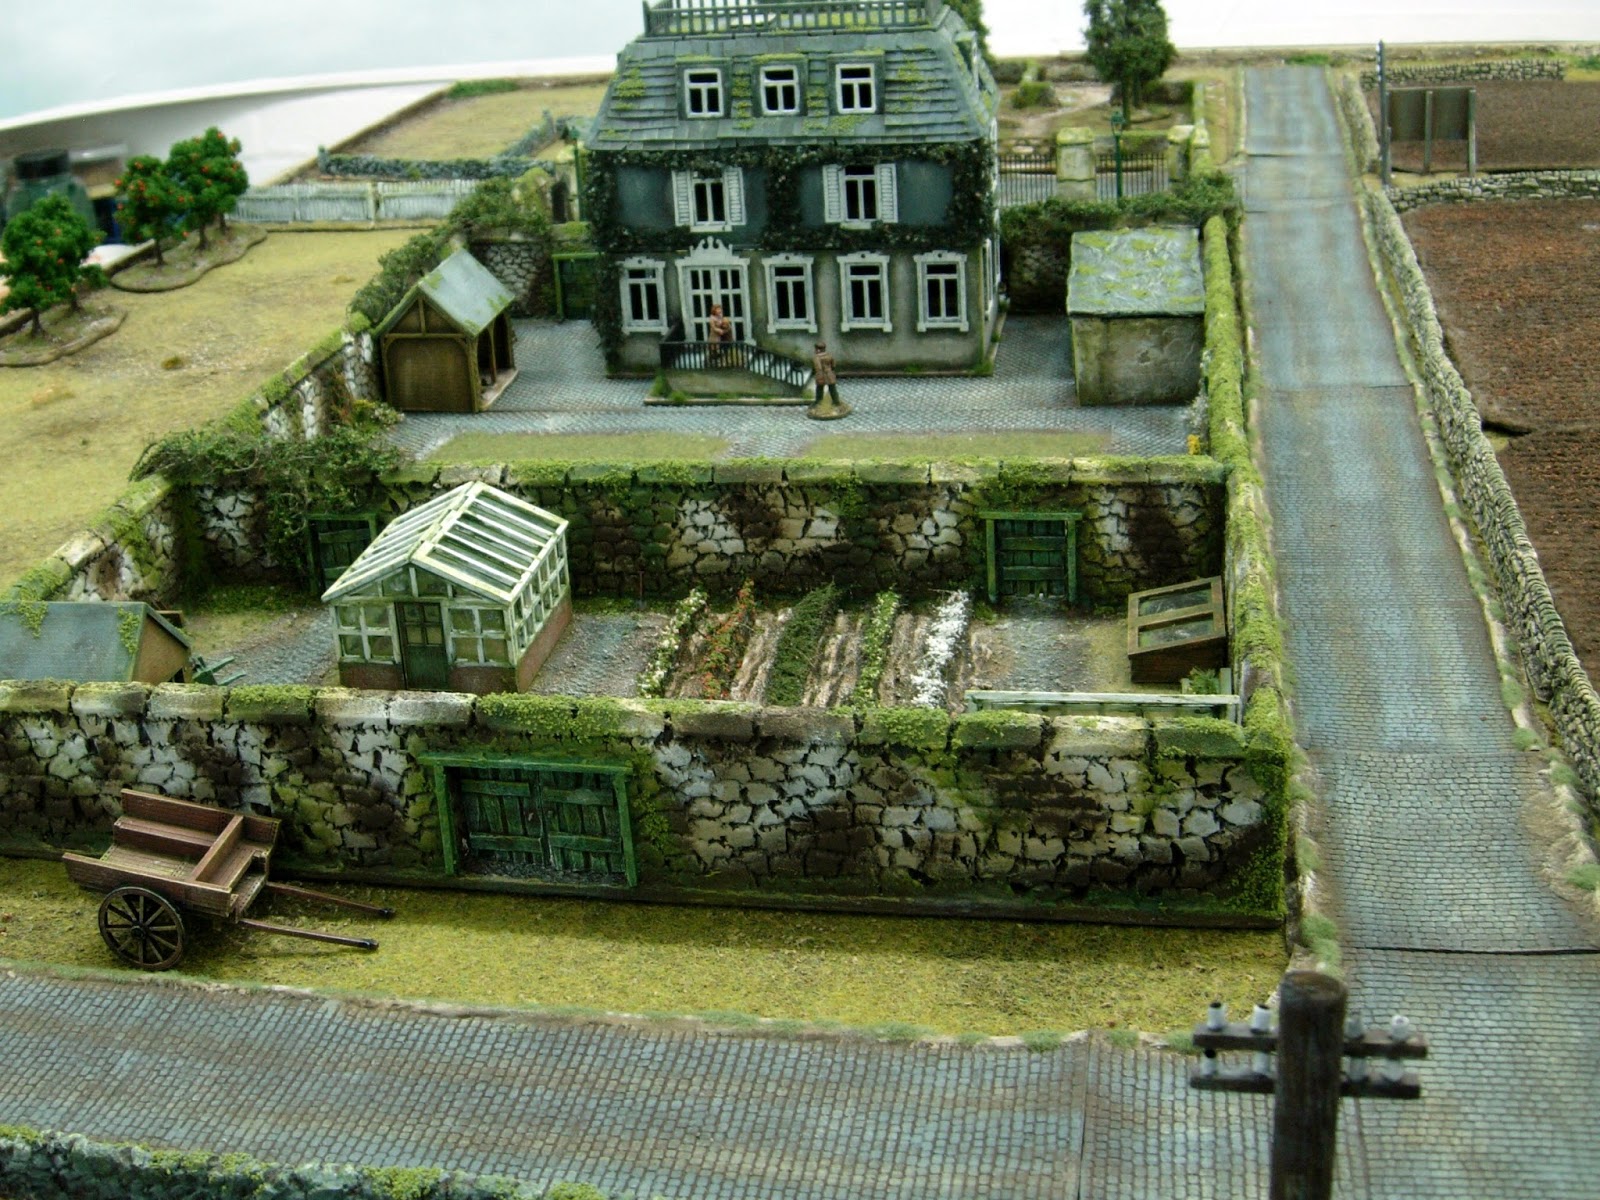


Apart from the yellow flowers, I also used small pieces of rubberised horsehair and tree foliage for flowers and plants along the edge of the walls and for rows of plants in the walled vegetable garden.


This picture shows the grounds in its four parts.
