As the title says, IABCoCM is my adaption of combining both sets of the Too Fat lardies WW2 rule sets I AIN'T BEEN SHOT MUM and CHAIN OF COMMAND for large tank engagements.
I really like the armour rules in CoC but as the game is designed more at infantry platoon level, I have used the card activation from IABSM, to enable me to control a full British tank squadron, plus a recce troop of armoured cars, a total of 21 vehicles and an infantry platoon on one side (controlled by 2 players).
These were up against a German defence force of various ATG's, 3 x Panthers and a couple of tank hunting teams controlled by one player and marked on a map of the table as hidden and on overwatch.
I invited three of my friends over for the game that I would be umpiring, Paul Hammond and Dave Green controlled the British tank squadron and supports, whilst John Warren marked up his defending German units on the map.
Using the rule amendments, the players were able to handle the large amount of vehicles and infantry platoon with ease and the game mechanics flowed. This was helped by the fact that we have all played and are familiar with both sets of rules.
Having said that, it was the British lack of infantry support that brought the armour to a grinding halt. Historically, sending unsupported armour in amongst buildings, hedges and narrow country lanes is a tank commanders worst nightmare and a few hidden panzerfaust and panzerschreck teams in the game gave the British players theirs.
I wanted the game to be a mainly tank action game but just like in real history, after a couple of tanks and armoured cars got brewed, the British players were having none of this and pressed their infantry forward to flush out the tank hunter teams and in turn, were ambushed by the hidden HMG teams. This just goes to show how realistic the Too Fat Lardies rule systems are, when they encourage you to make the right tactical choices in achieving your objectives with minimum casualties.
I have attached the rule adjustments and player briefings at the end of this post.
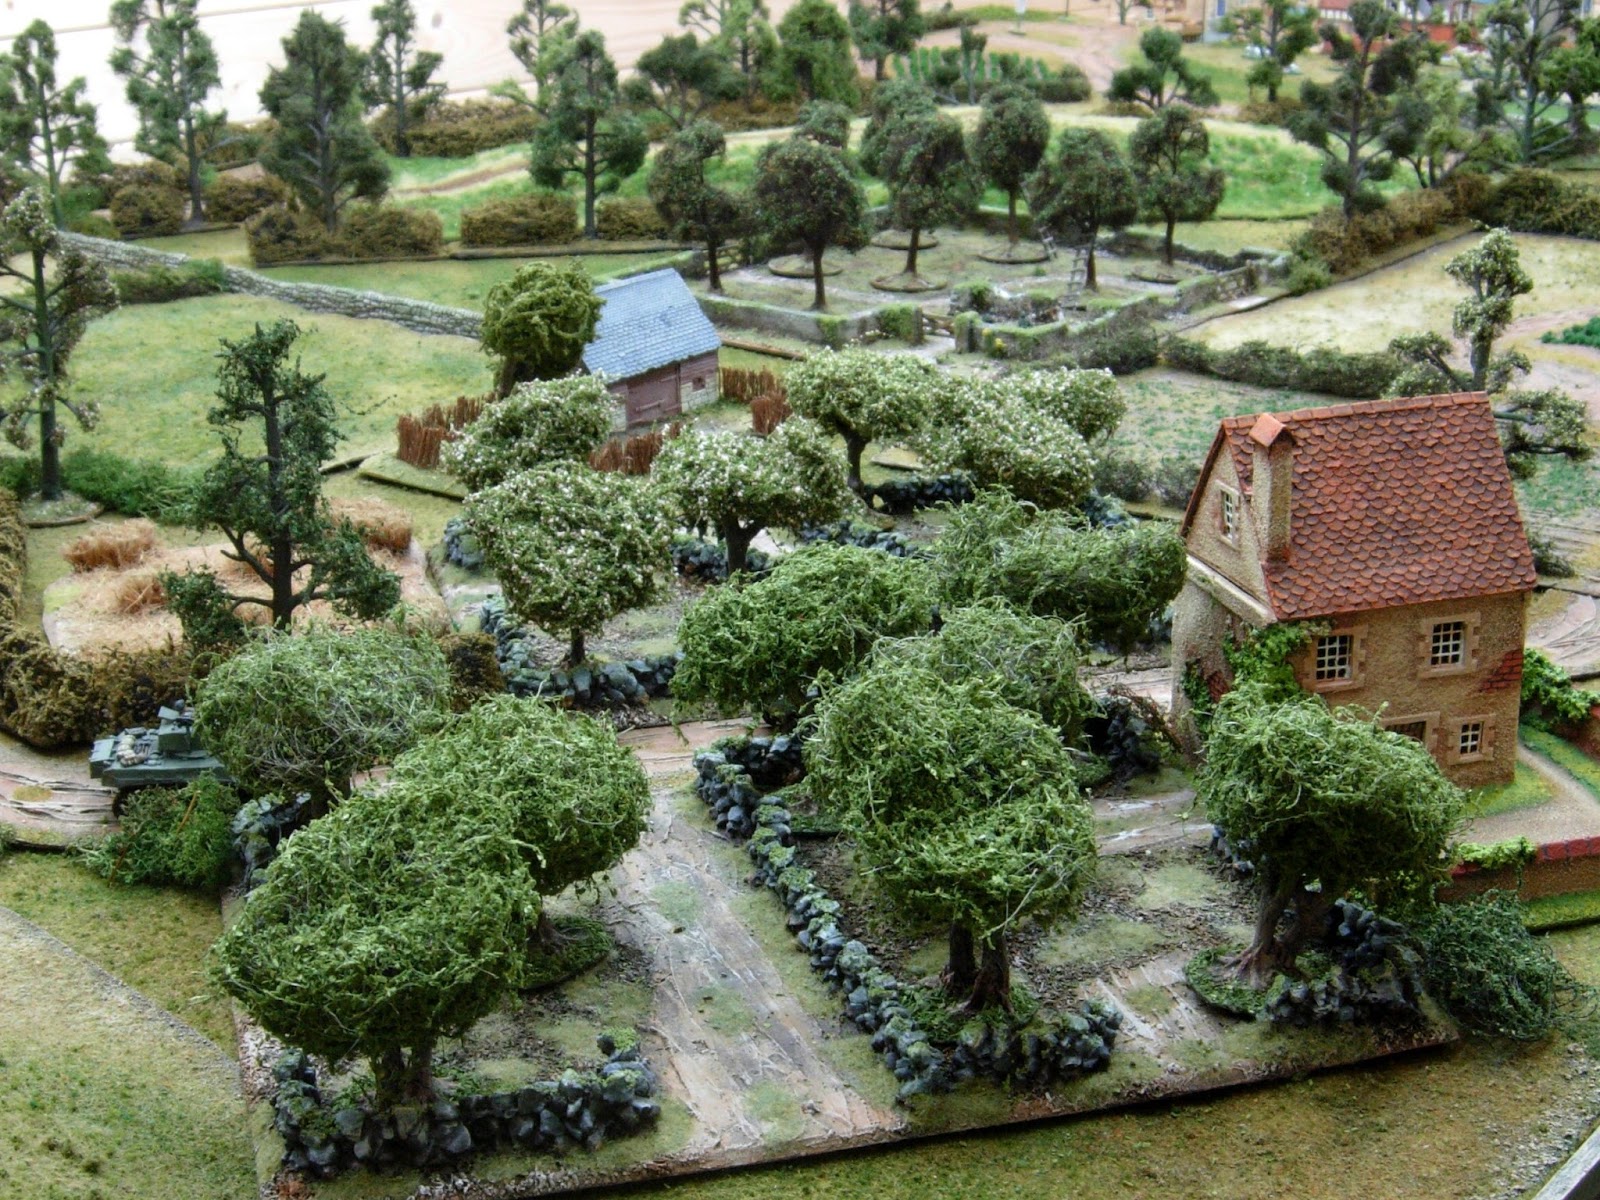
I didn't take any pictures of the actual game but the pictures below are of the table layout the day before.
The 20mm vehicles, figures and buildings are part of a huge collection that I had swapped with a friend, Steve Lygo in return for me painting him a couple of hundred Back of Beyond figures (see earlier posts on this blog) and my 28mm Age of Arthur collection. The buildings are a little too clean for my liking, so I will give them a little weathering, along with some of the vehicles and redo the bases on the figures. Other than that, it is a superb collection that I will add to and be showing more of in future posts.
Although it doesn't show it very well in the pictures, I am very pleased with the terrain mat sections that I had made a little while ago, as they give a good indication of high ground and rolling hills in the game and work well with both 28mm and 20mm.
A trio of armoured cars probing through the outskirts of a village.
A British foot patrol advancing down along the hedgeline. AB figures.
A German HMG team covering the tank hunting teams, laying in wait for the enemy armour.
A panzerschreck team in an orchard biding their time.
British infantry section debussing on the hurry up.
British armour pushing forward without the infantry.
A panzerfaust team laying in wait behind the hedgerows.
German ATG covering the crossroads.
A group shot of some of the lads. This picture was taken at a previous game held at Steve Lygo's gaff. Dave Green who was at the IABCoCM game is not in this picture, whereas Steve Lygo who wasn't, is or who is, wasn't???
On the left we have the tall fellow, Paul Hammond who is part owner of Alban Miniatures and I will be discussing that in a future post. Then we have not quite so tall Lord John Warren, who actually is standing on his tiptoes for this picture. Third in line is the very short chap, Mr Steve Lygo who is actually standing on a box for this photo and then last but not least myself, the guy with the green bush.
As with all my posts, I will be finishing off with a link for anyone interested in going on the waiting list for my book SETTING THE SCENE to contact
www.kerstinsmith1234
@gmail.com
and once I have enough interest I will do a third print run.
SQUADRON SIZE TANK RULES
CoC tank rules with following amendments.
Card activation as for IABSM with a card allocated for each Tank Troop/Zug, HQ and the Tea Break card.
When HQ or Troop/Zug card is drawn, 4 x dice rolled (as you would with CoC) for that unit with the following effect:
1 – no activation
2 – no activation
3 (or 1 and 2 combined) – Junior Leader of tank : 2 activations.
4 (or 1’s and 2’s combined) – Senior Leader of Troop/Zug: 3 activations for his or other tanks in his Troop/Zug.
5 – no activation
6 – Two or more sixes rolled as per CoC rules.
When HQ card is drawn - as above with the addition of:
3 or 4 can activate a Junior/Senior Leader with 2 or 3 activations being used accordingly.
5 - One pip on CoC Dice for each 5 rolled. (Full CoC Dice rules as per rule book.)
HQ Senior Leaders may use activations for their own tank, the HQ Troop/Zug, or to allocate an activation to one of the other Troops/Zug in the Squadron.
If HQ is used for activating one of the other Troops/Zug in the Squadron, this can only be used for commanding the Troop/Zug as a complete unit, to advance, hold or fall back and not to engage in specifics such as firing, or commanding a ‘SINGLE’ tank in the allocated Troop/Zug to activate. (This is the role for the Troop/Zug commander (Junior Leader) on his activations, when his card is drawn from the pack)
MORALE – There is only one morale tracking card for each side and this will be for the whole squadron and controlled by the HQ Troop.
Squadron morale will fall by one point for each tank destroyed. No effect on morale if the tank is abandoned/immobilised/loss of gun or crew. (The enemy will still see a potential threat in front of them and will keep on firing until they see the tank brew up).
As with the main rules in the book, a Senior Leader (Squadron or Troop/Zug Leader) is unable to remove shock from another tank via radio, the shock must be removed by the commander of that actual tank.
Any units hidden on the map on overwatch prior to the start of the game, will have their card placed in the pack once the player has activated that unit by firing or moving.
GERMAN BRIEFING.
Several weeks have passed since the Allied landings on the 6th June and you and your fellow countrymen have made the invader pay dearly for every square inch of ground. You have fought stubbornly through the cornfields, hedgerows and woods of Normandy but then being a Hauptmann in the elite Panzer Lehr, it is what is expected of you.
Your orders are once again, to delay the enemy at all costs, from taking some small unmemorable French village. You have at your disposal the following mixed units, which you have organised into the following Defence Groups:
Defence Group 1
Junior Leader, HMG Team, Panzerschreck Team (3 x rounds), Panzerfaust team (2 x Panzerfaust).
Defence Group 2
AS ABOVE.
Defence Group 3
2 x Pak 40’s, 1 x Marder III
PANTHER ZUG -Tank 213 – Senior Leader
214 – Junior Leader
215 – Junior Leader
You may deploy Defence Groups 1,2 and 3 anywhere on the table up to 8ft (10ft table) forward from your table edge. They will be shown on the map as hidden and on overwatch. As soon as you fire or move one of these units, that unit will be placed on the table and its Defence Group card will be placed in the pack for further activations.
HQ will be placed in the village and their only role will be to roll for 5’s each time their card is activated. Once they have a full CoC dice they may choose to use this to call up the Panther Zug, which will arrive on the road leading through the village. You may also assign any full CoC dice to other units as per the rule book.
BRITISH BRIEFING
Several weeks have passed since the Allied landings on the 6th June and you and your fellow countrymen have paid dearly for every square inch of ground. You have fought stubbornly through the cornfields, hedgerows and woods of Normandy and you have been ordered once again to advance against the enemy and capture some unmemorable little French village.
You have under your command a Squadron of Sherman tanks, a Recce Troop and a platoon of infantry.
The ground ahead of you is typical Bocage country and ideal for the enemy for ambush amongst the hedgerows and narrow lanes. Due to heavy casualties, you only have the support of one infantry platoon to help combat this threat and you must push on with all haste. The rest of the regiment, along with 130 Brigade and the 43rd Division are behind you and waiting for you to clear the village so that the general advance can begin. Good hunting.
PLAYER 1
SQUADRON HQ
Tank 1 – Senior Leader, Tank 2- Junior Leader.
TROOP 1
3 X Sherman’s, 1 x Firefly
TROOP 2
3 X Sherman’s, 1 x Firefly
PLAYER 2
TROOP 3
3 X Sherman’s, 1 x Firefly
TROOP 4
3 X Sherman’s, 1 x Firefly
RECCE TROOP
3 X Stuart’s.
Player’s 1 and 2 have the option of splitting up and controlling the Infantry as they see fit.
1 x Infantry platoon with transport. (They also have the option of entering the table on foot).