Something I have been lacking in my terrain collection and
meaning to put right for some time is suitable trees for orchards, so to
rectify this I put them on my shopping list for Salute this year.
‘Last Valley’ do a nice smaller tree and was also selling walled
orchards, so I ended up buying a couple of these which I then repainted to
blend in with my own terrain. I will show you how I did this, along with making
my own walled orchards and trees and upgrading an MDF building, plus a few
other bits and pieces to add colour to your table.
TREES.
Most of my tree collection comes from ‘Last Valley’ but I thought
I would have a go at making a few myself. Rather than having the same shade of
green, I thought I would add a variety of colour and shape with my trees.
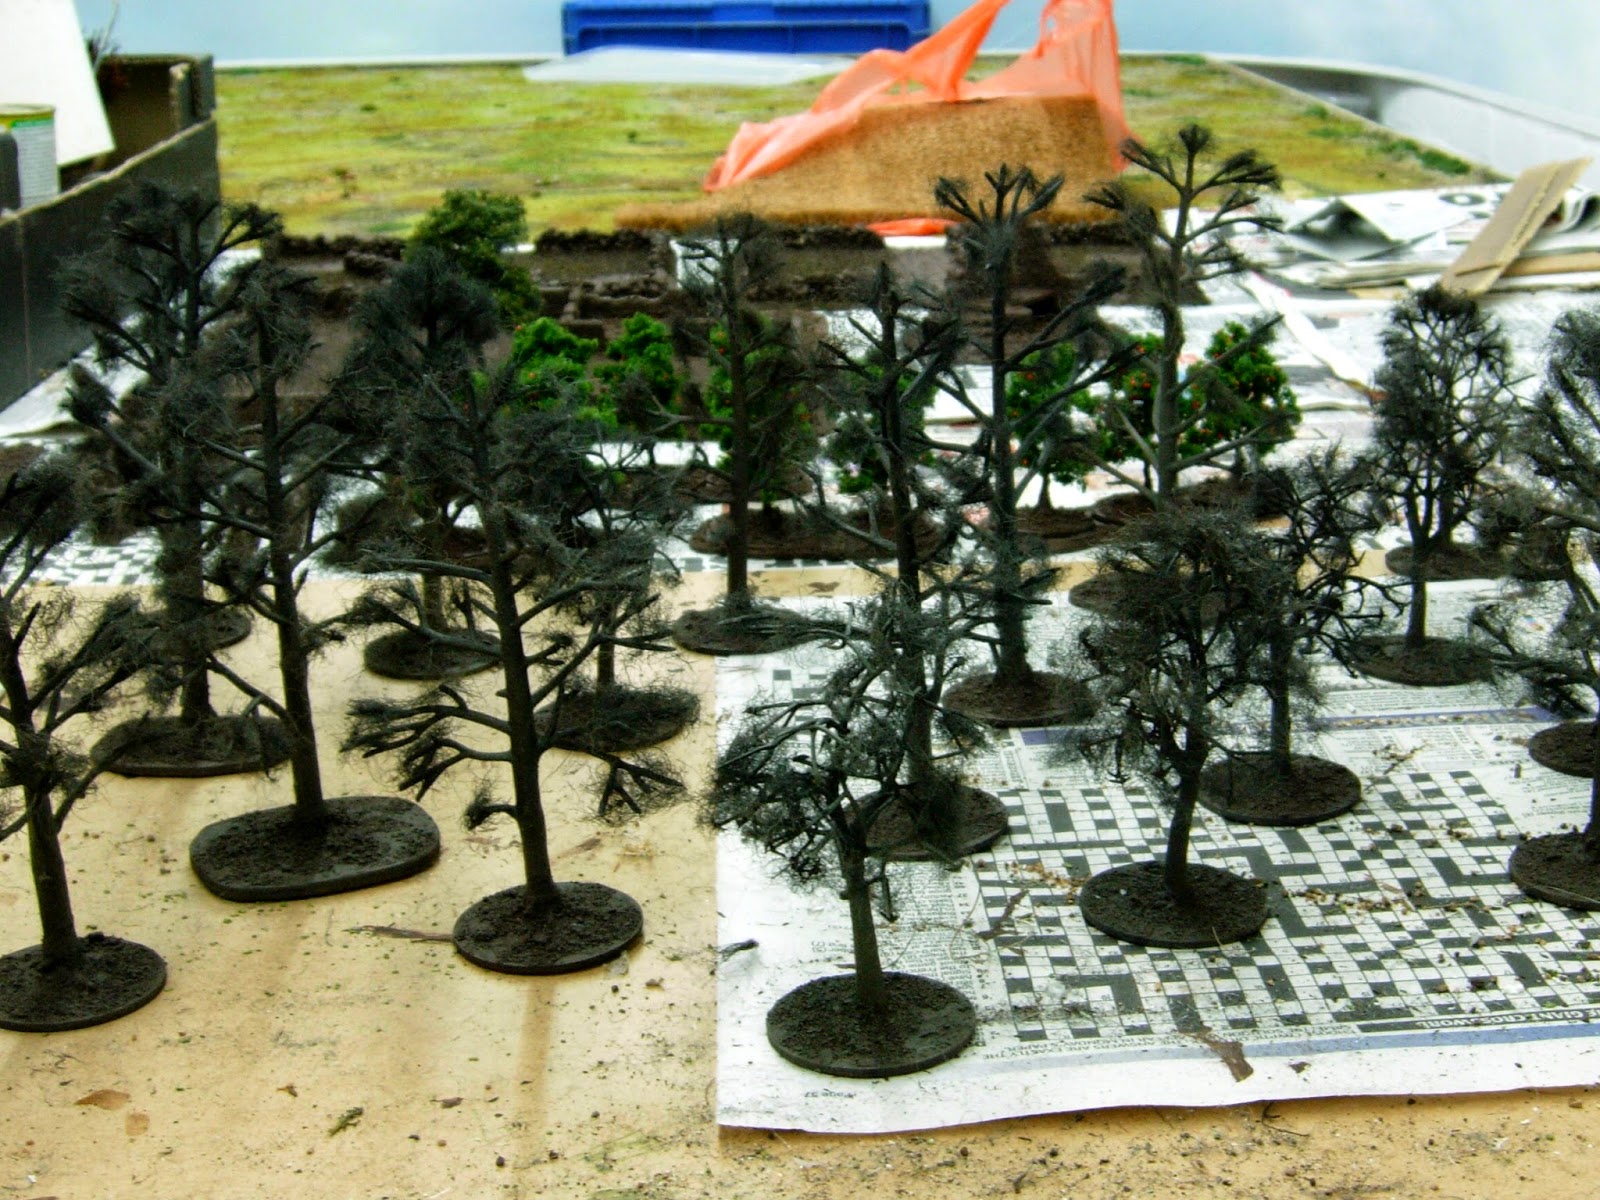
I had a pack of ‘Woodland Scenics’ plastic tree armatures so
I secured these to a base using a glue gun, followed by a layer of Tile Grout
and then sand and white glue to texture the base. Once dry, the tree and base were
painted dark brown.
SHAPE.
To add some body to the bare branches I attached steel wool
(a large roll for less than £2 from 4D Model shop) to the end of the limbs. I
did this by using an old pair of scissors to cut small pieces of steel wool and
gluing this onto the tree with white glue. I used a quality thick wood glue
rather than a cheaper, runny PVA glue to help form a good bond and brushed this
onto the branches where I wanted the fix.
I have tried to keep away from the dense foliage effect that
you get with your typical model tree when you stick a clump of rubberised
horsehair on top and cover in tree foliage and instead, have gone for less
foliage where you can actually see through the tree.
When the white glue holding the steel wool has dried, I used
a black primer spray to cover the steel wool, trying to keep most of the paint on
the upper part of the tree and away from the base. I then sprayed the tree with
several colours using a light misting method, using a grey, mid brown and then
green. I then brushed onto the trunk random patches of Wargames Foundry Phlegm
Green.
FOLIAGE
Paint and flock the base of your tree to match your existing
terrain and then you are ready for adding foliage to the tree. I used tree foliage
from ‘4D Modelshop’ on my larger trees and did this by brushing white glue onto
the steel wool and then sprinkling the foliage on top. Whilst you have the glue
and foliage out put a little of this onto your base as well to represent falling
leaves and it also helps to make the tree and base/terrain look like they
belong together.
TEXTURE
I used ‘fine texture’ foliage for my trees, which I
personally prefer the look of compared to the ‘clump’ foliage type of tree. An
added advantage of fine texture foliage glued to steel wool is that it doesn’t keep
dropping off the tree unlike clump foliage, which does. I have read that you
can apparently spray the clump foliage with hairspray or other fixative to try
and counter this, so if this is your thing and you want to go down this branch,
then start spraying the Harmony.
I purchased some 4Ground apple trees at Salute this year for
my orchards as they actually have lots of little red apples on the branches.
The only drawback is, that these were also made with clump foliage, so I will
have to handle them carefully to prevent too much of it ending up on the
ground. They come with round MDF bases that slot into a bigger base that holds
two and three trees in each. I have textured and painted these to match my own
terrain and will keep them attached to the bigger base to help prevent them
getting knocked and losing their foliage.
COLOUR
4D do a range of different colour tree foliage, so apart
from your light, medium and dark green colours you can also try using pink and
green, yellow and green, red and green, plain white or whatever takes your
fancy to brighten up your table.
I used the red and green on poppy fields that I made for my
Afghanistan terrain and you could also use this colour for a rosebush and
brambles. The yellow and green I have used for making springtime hedges and the
pink and green is ideal for apple blossom.
I have done this with some of my ‘Last Valley’ trees simply
by brushing white glue onto the existing foliage and then sprinkling with the
colour foliage of your choice.
HEDGES & BUSHES
The springtime hedge can be made in literally just a couple
of minutes. Cut or tear your rubberised horsehair to your required length and
size. I cut mine with scissors about an inch wide and six inches long and then
pull it apart into two pieces along its length. Brush white glue on the sides
and top and cover in foliage. Job done, you don’t even need to paint the
horsehair beforehand.
You can see the springtime hedge I made, which is just to the rear of the cart.
Same with the rosebush/brambles but I would spray the
horsehair brown for this and then just tear off a little clump of horsehair and
cover lightly in white glue and foliage. Easy.
ORCHARD TREES
I had some small plastic tree armatures that I bought
cheaply off ebay and which came from Hong Kong. The first two trees that I ever
made I used these armatures for, when I made a scenic base for my WW2 German anti-tank
gun. This was my first experience of using clump foliage and I think it will
only be a matter of time before I can start using the base for a winter theme
as the trees shed their foliage.
The rest of the trees from this batch I have used for my
orchard trees as they are small and have lots of branches. I have made them the
same as I did for the bigger ‘Woodland Scenic’ trees but I used ‘Antenocitis
Workshop’ tri-colour camouflage leaves, followed by some ‘miniNatur’ apple tree
foliage to cover the steel wool.
I also used the tri-colour camo leaves over some small
branches of Seefoam and glued this to my Tiger Tank and will probably use it on
some of my other late war vehicles.
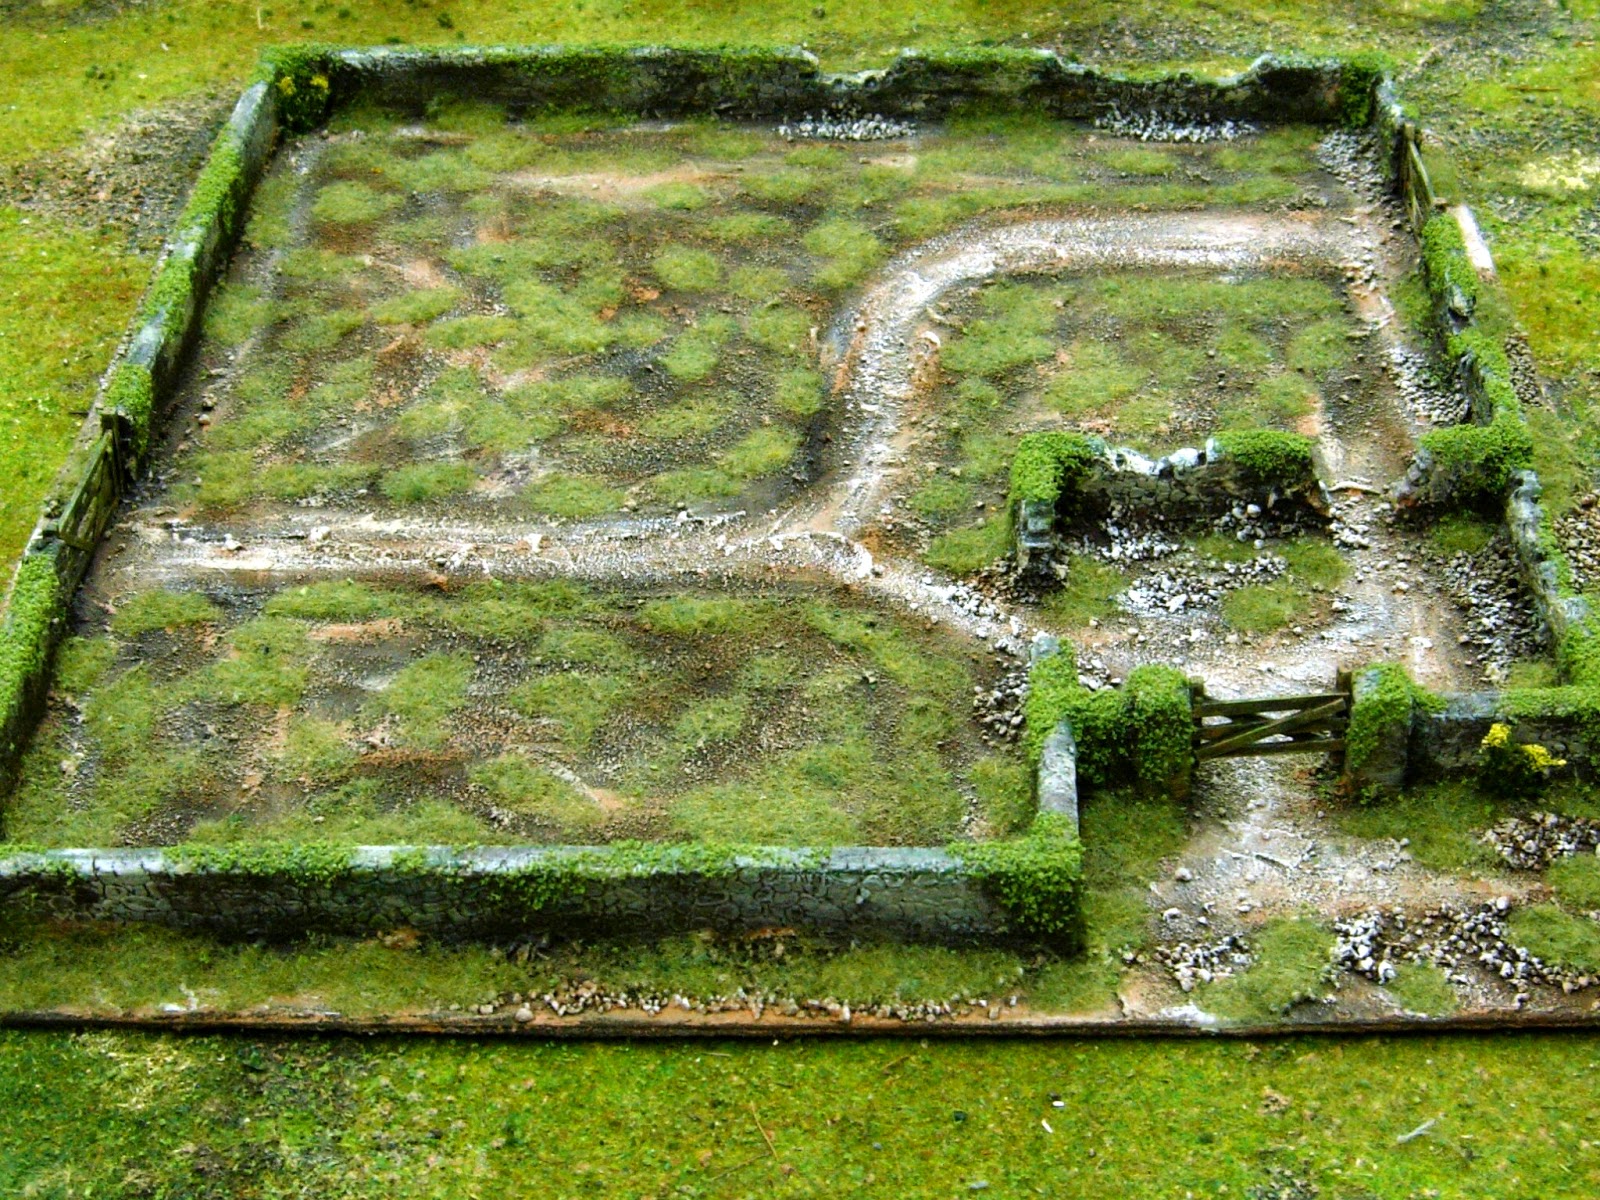
ORCHARD BASE & WALLS
As I mentioned at the beginning of this article, I used a
couple of ‘Last Valley’ orchards that I purchased at Salute and repainted and
flocked them to blend in with my own terrain. I also had a boxset of plastic
walls from ‘Warlord Games’ that I decided to use to make a walled orchard. I
laid all the walls out into a suitable configuration to give me an idea of how
big a base board I would need for my orchard. I used hardboard for the base
(smooth side up, as less absorbent, to help prevent warping) and glued the
walls down onto this. I then used tile grout to cover up the joins on the walls
and to use as a first textured layer for my base, followed by white glue and
sand to finish the groundwork. I also had to make an additional small gate out
of balsa wood as I had three openings and only two gates.


When dry, I did my usual method of painting, by covering the
whole thing in ‘Sandtext’ masonry paint using Bitter Chocolate first. The
wooden gates and ground work was given a drybrush of mid brown, followed by
Sandtext mid stone. I skipped the mid brown on the walls and went straight for
Mid Stone, where I used a mixture of painting and dry brushing to give the
impression of a light colour mortar between the brickwork, followed by a
mixture of Choc Brown and Mid Stone blotches and then just Choc Brown blotches over
the wall. I finished off the painting of the wall by using ‘Wargames Foundry’
Phlegm Green 28A and then 28C dabbed on the top and in the corner of the walls
and a little on the gates to give an impression of moss.
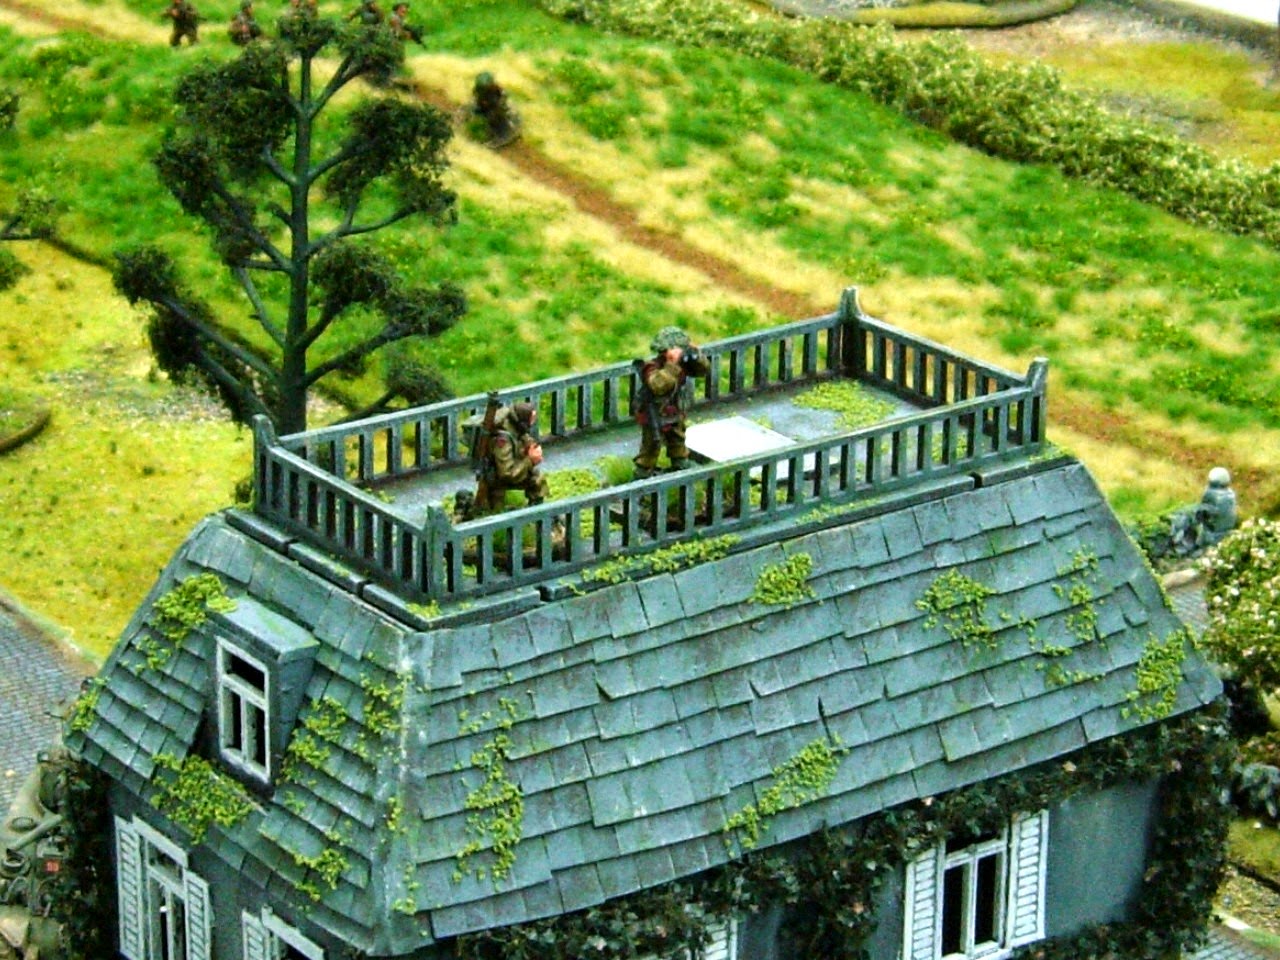
I have also been experimenting with light green, tree foliage
(fine grade), to represent damp moss growing over the walls and roof tops of
buildings and I used this to finish off the orchard walls along with my newly
made trees and a couple of flowers from ‘miniNatur’ glued into the corners.
MDF LASER CUT BUILDINGS (Sarissa)
Inspired by the way Richard Clarke modified his Radar
Station and all his other buildings, I did a direct copy as they look so bloody
good I just had to have one. (See his excellent blog at 'Too Fat Lardies' for a better version of how this and
his other buildings are made.)
I also put together the Chateau that Sarissa make and added
the moss effects that I mentioned earlier, along with some vines from
‘miniNatur’ growing up the side of the wall.
The water fountain is another piece of MDF kit by Sarissa
but I have just gone for the painted moss effect with this, whereas the walls
behind have had both painted and foliage versions of moss applied.
I used the original base from the radar Station along with an old ruined tower kit that I had, which had been lying about unfinished for years and used this for a test piece for trying out some painting and texturing moss effects.
I also made a colour chart for mixing my static grass to get a more pleasing effect, rather than just applying one colour straight from the tub.
Hope this has been of some use to you and will help to bring
some colour to your battlefield.
And to finish off, the usual action shots using the latest collection of terrain.