Big Chain of Command - Battle of the Bulge, just to clarify the heading and to ensure you that you are not visiting some dodgy site.
My blog posts are becoming a bit infrequent of late, so I thought I would update you with a game I put on recently, when I invited a few friends to play on my new winter terrain that I finished making at long last.
I decided to play the Too Fat Lardies, Big Chain of Command WW2 rules as there were three players plus myself umpiring. I also had that desire of wanting to get as much of my collection of winter figures and vehicles on the table as possible, as it was the first time I have actually gamed with them.
I have made some amendments and added a few house rules to the original set and I have put these, along with the lists at the end of this post for anyone who may be interested.
Two of the players controlled a Volksgrenadier and Panzergrenadier platoon each, along with their own supports. They also had their own morale card and 5 x command dice each.
The single American player had one platoon and supports, which were marked out on the map and hidden on overwatch, plus one morale card and 5 x command dice . He also had additional armoured supports, which would be controlled with 3 x command dice and re-rolling any 5's and 6's as they would not benefit from building up CoC dice or keeping the initiative with a double 6.
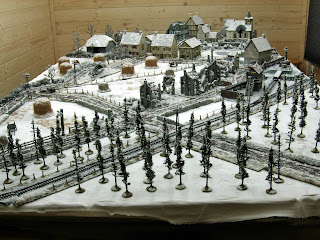
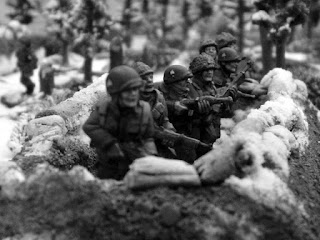
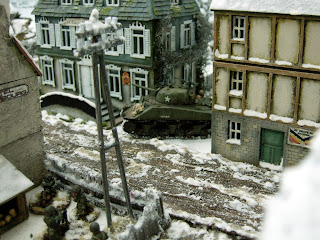
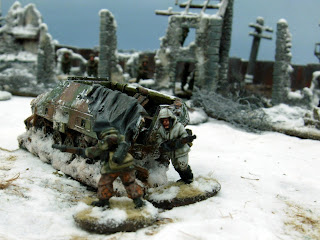
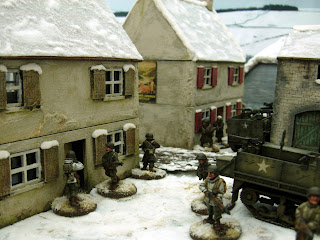
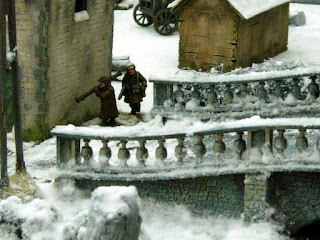
Anyway, for those that may be interested, you can read more at the end of this post. For the rest of you, here is a bunch of pictures of the actual table layout that we used on the day but not of the actual game that was played.
A map of the table with the Germans approaching from the left and the Americans deployed and hidden on overwatch, anywhere from the right, up as far as the red line.
The table (5' x 10') layout and view from the German approach.
FOO hidden under a cart.
BIG CoC – THE BULGE
VEHICLE MOVEMENT – THIS REPRESENTS THE WEATHER
CONDITIONS AT THE TIME HAVING A BIG IMPACT ON THE SURROUNDING AREA, CAUSING MONUMENTAL
TRAFFIC JAMS AND ANY ATTEMPT AT VEHICLES LEAVING THE ROADS BECOMING BOGGED DOWN
IN THE MUD AND SNOW.
ON ROAD (AND RAILWAY TRACK) - ALL VEHICLES ROLL 2 X D6, IF A DOUBLE IS
ROLLED THEN TEMPORARILY IMMOBILISED. ON SUBSIQUENT ACTIVATIONS ROLL A D6,
FREEING THEMSELVES ON A 5 OR 6 AND MOVING THAT FAR IN INCHES. HOWEVER, A ROLL
OF 1 WILL IMMOBILISE THEM FOR THE REST OF THE GAME. (wheeled vehicles and King Tiger need to roll
a 6 to free themselves).
IF A VEHICLE IS BLOCKING A ROAD THEN ANOTHER VEHICLE
OF THE SAME SIZE OR BIGGER MAY ATTEMPT TO PUSH THAT VEHICLE OFF THE ROAD,
ROLLING A D6 AND MOVING THAT FAR IN INCHES.
OFF ROAD – ALL VEHICLES ROLL 3 X D6 AND DISCARD THE
FOLLOWING DICE:
WHEELED VEHICLE AND KING TIGER – DISCARD 2 X HIGHEST DICE
HALFTRACK – DISCARD HIGHEST AND LOWEST DICE
TRACKED – DISCARD 2 X LOWEST DICE
IF A DOUBLE IS ROLLED THEN TEMPORARILY IMMOBILISED. ON
SUBSIQUENT ACTIVATIONS ROLL A D6, FREEING THEMSELVES ON A 6 AND MOVING THAT FAR
IN INCHES. HOWEVER, A ROLL OF 1 OR 2 WILL IMMOBILSE THEM FOR THE REST OF GAME.
(wheeled vehicles and King Tiger immobilised on a 1,2 or 3)
IF IMMOBILISED FOR THE REST OF THE GAME BUT NOT UNDER FIRE
THEN THE PLAYER HAS THE CHOICE OF ABANDONING THE VEHICLE FOR NO LOSS OF MORALE
BUT IF HE CHOOSES TO FIRE ITS WEAPONS, THEN LOSS OF MORALE WILL APPLY AS NORMAL
IF THE VEHICLE GETS DESTROYED BY ENEMY FIRE.
MOVEMENT SUMMARY AFTER BEING
IMMOBILISED (rolling a double)
ON ROAD
5 0R 6 - FREE TO MOVE (wheeled vehicles/King Tiger
need a 6)
2,3 OR 4 – STILL IMMOBILISED
1 – PERMANENTLY IMMOBILISED
OFF ROAD
6 – FREE TO MOVE
3, 4 or 5 -STILL IMMOBILISED
1 or 2 – PERMANENTLY IMMOBILISED
(wheeled vehicles/King Tiger 1,2 or3)
MOVEMENT ON FOOT
ROAD AND RAILWAY TRACK AND BUILT UP AREAS – BROKEN GROUND
(AS PER BOOK PAGE 28)
OPEN GROUND AND WOODS – HEAVY GOING (PAGE 28)
ALL HEDGES, FENCES AND WALLS CLASSED AS MEDIUM OBSTACLES,
DISCARD THE HIGHEST DICE.
COVER FROM FIRE
WALLS AND SNOW BANKS – HEAVY COVER
FENCES AND HEDGES – SOFT COVER
WIRE FENCE – NO COVER
NO PATROL PHASE OR JUMP OFF POINTS
US FORCES ARE EITHER MAPPED ON TABLE ON OVERWATCH OR WILL
ARRIVE BY ROAD.
VOLKSGRENADIER VEHICLES WILL ARRIVE BY ROAD OR RAILWAY LINE.
DUE TO THEIR LACK OF TRANSPORT THE INFANTRY CAN ALSO ARRIVE ANYWHERE ALONG
THEIR BASE LINE.
PANZERGRENADIER INFANTRY MUST ENTER THE TABLE INITIALLY
MOUNTED IN THEIR HALFTRACKS AND ARRIVE BY ROAD OR RAILWAY.
THIS WILL HELP TO REFLECT THE NIGHTMARE TRANSPORT PROBLEMS
AND BOTTLENECKS SUFFERED ON THE ROADS BY BOTH SIDES. (ANY US INFANTRY SUPPORT
WILL ALSO BE ARRIVING BY VEHICLE ON ROAD)
SMALL WOODEN BRIDGE – (UMPIRES
EYES ONLY) -TEST TO SEE IF COLAPSE WHEN VEHICLE TRAVELS OVER IT.
SMALL VEHICLE (JEEP, KUBELWAGON) – NO EFFECT.
MEDIUM VEHICLE (TRUCK, HALFTRACK, A/C) – BRIDGE COLLAPSES ON
A D6 ROLLING A 6
HEAVY VEHICLE (TANK, TANK DESTROYER) – BRIDGE COLLAPSES ON A
D6 ROLLING A 5 OR 6
VEHICLE WILL BE ABANDONED BUT NO LOSS OF FORCE MORALE UNLESS
VEHICLE ALREADY UNDER FIRE AT THE TIME.
U.S.ARMY - TASK
FORCE CHERRY
ON TABLE AND HIDDEN ON OVERWATCH (MAP)
RIFLE PLATOON – REGULAR - 5 X COMMAND DICE
MEDIC/SNIPER/ATG with junior leader/3XMMG/3XBAZOOKA TEAMS.
OFF TABLE – MAKE A LIST AND DESIGNATE WHICH SUPPORTS ARE
ARRIVING ON WHICH OF THEIR TWO ROADS.
These may start arriving on the start of turn two or after
you have obtained and spent a full CoC dice to do this.
YOU HAVE 3 X COMMAND DICE FOR YOUR VEHICLES = RE-ROLL any
5’s and 6’s as these can’t be used for keeping the initiative for next phase
with double 6’s or adding to CoC dice with 5’s.
WHEN YOU DEBUS THE OCCUPANTS WILL THEN BE CONTROLLED BY YOUR
PLATOON’s 5 X COMMAND DICE AND NOT THE 3 X VEHICLE COMMAND DICE.
1 x regular squad with junior leader – in HALFTRACK
1 X 60MM MORTAR TEAM and 5 crew – in HALFTRACK
1 X FOO (81MM MORTAR) – in DODGE
1 X regular PARA SQUAD with junior leader – in TWO AND A
HALF TON TRUCK
1 X M4 SHERMAN with junior leader
1 X M4 SHERMAN with junior leader
1 X M4 SHERMAN with SENIOR leader
1 X M10 with junior leader
1 X M10 with junior leader
1 X M8 with junior leader - recon
1 X M8 with junior leader – recon
1 x M5 STUART with Senior Leader - recon
VOLKSGRENADIER & PANZERGRENADIER
IN ADDITION TO THEIR OWN SENIOR LEADER THE GERMAN PLAYERS
GET TO SHARE THE OVERALL KAMPFGROUPPE COMMANDER ON ALTERNATE TURNS.
Whoever is
controlling the KG Commander at the time, will count any double 6’s to keep the
initiative in the next phase. If the non-controlling German player rolls the
double six, keeping the initiative in the next phase is ignored.
KAMPFGROUPPE LEADERSHIP
IS USED THE SAME AS A SENIOR LEADER IN A VEHICLE BUT INSTEAD OF JUST HAVING
CONTROL OF A THREE VEHICLE PLATOON/TROOP HE CAN ACTIVATE ANY OF HIS VEHICLES
(VOLKS OR PANZERGRENADIER PLAYER, DEPENDING ON WHO’S TURN) ON THE TABLE VIA HIS
VEHICLE RADIO.
THE ABOVE WILL HELP THE GERMAN PLAYERS TO KEEP THEIR
VEHICLES ACTIVATED BUT ONLY HAVING THIS BENEFIT ON ALTERNATE TURNS REPRESENTS THE
AMOUNT OF RADIO TRAFFIC CONFUSION, POOR SIGNALS AND HAVING TO BE MINDFUL OF THE
ENEMY LISTENING IN.
THE KAMPFGROUPPE COMMANDER IS IN A SCHWIMMWAGEN (WHEELED
VEHICLE) AND WILL BE ACTIVATED ON A 4. SEE 11.4 COMMAND BY RADIO, PAGE 51 MAIN
RULE BOOK.
THE KAMPFGROUPPE COMMANDER IS NOT SUBJECT TO ENEMY FIRE BUT
JUST A NOMINAL FIGURE PLACED ON EITHER THE VOLKSGRENADIER OR PANZERGRENADIER
PLAYERS SIDE OF THE TABLE TO INDICATE WHICH PLAYER HAS CONTROL.
INFILTRATION COMMANDOS (GERMAN
PLAYERS EYES ONLY)
OTTO SKORZENY’S ENGLISH SPEAKING GERMANS DRESSED IN AMERICAN
UNIFORMS AND SENT BEHIND THE ENEMY LINES TO CAUSE HAVOC AND CONFUSION.
2 X GERMAN INFANTRY WITH SMG’s, DRESSED AS MP’S IN JEEP.
ACTIVATED WITH A FULL COC DICE.
PLACED ON ONE OF THE TWO ENEMY ENTRY POINTS. THEY WILL
PREVENT ENEMY SUPPORTS DESIGNATED TO ENTER AT THAT POINT OF THE TABLE.
CAN ONLY BE REMOVED
BY AMERICAN PLAYER USING A FULL COC DICE OR MOVING A LEADER AND TEAM THAT ARE
ALREADY ON TABLE INTO CLOSE COMBAT. (THE CLOSE COMBAT RATHER THAN SHOOTING,
REPRESENTS THE GI’s HAVING TO GET UP CLOSE TO VERIFY THE MP’s ARE INFACT
GERMANS)
THERE WILL BE NO MORALE EFFECT FOR THE GERMAN PLAYER WITH
THE LOSS OF THEIR COMMANDOS AS THEY WILL BE OUT OF CONTACT WITH THEIR PARENT
UNIT BUT IF THE GI’s LOSE THE COMBAT THEN A MORALE TEST NEEDS TO BE TAKEN AS
NORMAL.
THE
AMERICAN PLAYER WILL NOT KNOW ABOUT SKORZENY’s COMMANDOS UNTIL THEY HAVE BEEN
PLACED ON THE TABLE (OTHERWISE HE MAY BE TEMPTED TO GET AS MUCH OF HIS SUPPORTS
ON THE TABLE AS SOON AS POSSIBLE BEFORE YOU REACH A FULL COC DICE AND DEPLOY
YOUR COMMANDO)
VOLKSGRENADIER
ASSAULT PLATOON - REGULAR - 5 X COMMAND DICE
HQ - SENIOR LEADER X 2 STG44 OR MP40, MEDIC.
RIFLE GRENADE TEAM – 3 X MEN WITH RIFLEGRENADES
PANZERSCHRECK – 2 X MAN CREW
ASSAULT SQUAD 1 & 2
JUNIOR LEADER – STG44 OR MP40
2 X PANZERFAUST
RIFLE TEAM – 7 X MEN STG44 OR MP40
SUPPORT SQUAD
JUNIOR LEADER – STG44 OR MP40
2 X PANZERFAUST
MG TEAM 1 – MG42 - 2 X CREW, 2 X MEN STG44 OR MP40
MG TEAM 2 – MG42 – 2 X CREW, 1 X MAN STG44 OR MP40
ADDITIONAL SUPPORT
1 X TRUCK WITH FOO AND SNIPER. (SNIPER CAN DEPLOY 12 X
INCHES FROM TRUCK)
1 X TRUCK WITH MG 42 ON TRIPOD AND 5 X CREW AND 5CM MORTAR
TEAM.
PAK 40 WITH 5 CREW AND JUNIOR LEADER (HORSE DRAWN, MOVE AS
INFANTRY)
INFILTRATION COMMANDOS – JEEP, 2 X commandos (MP’s) WITH
SMG’s (activated with CoC dice)
A/C 222
PANZER IV
3 X HETZER WITH 2 X JUNIOR AND 1 X SENIOR LEADER
PANZERGRENADIER
REINFORCED PANZERGRENADIER PLATOON WITH ADDITIONAL SQUAD –
REGULAR – 5 X DICE.
HQ – 2 X Senior Leaders, Panzerschreck team, medic and FOO
– Halftrack (251/7 PanzerBuchse).
SQUADS 1 – 4 – Must arrive on table via road or rail in
Halftracks
Junior leader with machine pistol
2 x Panzerfausts
LMG Teams One - 2 x crew, 3 x riflemen
LMG Team Two – 2 x crew, 2 x Riflemen
ADDITIONAL SUPPORT
251/9 Stummel
Panzer IV
Panther
King Tiger
INFILTRATION COMMANDOS – JEEP, 2 X commandos (MP’s) WITH
SMG’s (activated with CoC dice)
AMERICAN BRIEFING
The 560th Volksgrenadier and 116th
Panzer Divisions were moving in the direction of Houffalize and would soon cut
off the defenders of St. Vith.
Task Force Cherry has been given the job of forming part of
the defensive line in front of St. Vith in one of the outlying villages with a composite
force from a platoon of the 423rd Infantry that had been the 106th
Divisions headquarters guard, some Engineers, elements of the 82nd
Airborne Division, a troop of the 87th Armoured Cavalry
Reconnaissance Squadron, along with some armour from the 31st Tank
and 814th Tank Destroyer Battalions.
Most of the Task Force would be in reserve in St.Vith, ready
to support your front line or respond elsewhere if needed.
The main bridge over the River Our which runs through your
village must be kept open at all costs for the withdrawal of friendly forces
and to prevent entrapment of the rest of the Division.
You have the following units to deploy as you see fit on the
map hidden and on overwatch.
RIFLE PLATOON –
REGULAR - 5 X COMMAND DICE
HQ – 2 X SENIOR LEADERS WITH CARBINE OR SMG - BAZOOKA TEAM,
MEDIC.
SQUADS ONE TO THREE
JUNIOR LEADER
BAR TEAM 2 X CREW WITH 1 X RIFLEMAN
RIFLE TEAM – 8 RIFLEMEN.
SNIPER
ATG with junior leader and 5 x crew
3 X MMG TEAMS
3 X BAZOOKA TEAMS.
Due to heavy enemy pressure along the entire front, Divisional
Headquarters are reluctant to release the rest of your Task Force unless the
situation becomes critical, so you will need to use a full CoC dice to get
things moving.
Only then will you be given 3 x command dice for your
vehicle supports and you may reroll any 5’s and 6’s as these have no effect
towards your CoC dice or taking the initiative in the next phase with a double
6.
There are two roads that your supports may arrive on. Make a
list of which supports are coming on which of the two roads.
GERMAN
BRIEFING
The 560th Volksgrenadier and 116th Panzer Divisions were
moving in the direction of Houffalize and would soon cut off the defenders of
St. Vith.
Kampfgrouppe von Green has been assigned the critical task
of capturing the bridge over the River Our which runs through one of the
outlying villages South of St. Vith, preventing the escape of a large part of
an American Division.
Following a massive German pre – bombardment the way ahead
looks clear. Maybe the enemy has pulled back or better still, been wiped out
after that severe stonking.
Dusk is fast approaching so you need to press on, clear the
village and secure the bridge. If only the bloody roads didn’t cause such
delays, you could be halfway to the River Meuse by now, repeating history in
the footsteps of a Panzer Division under an obscure General, Erwin Rommel, who
in 1940 reached the Meuse in three days.
von Green has his work cut out trying to coordinate the
slower moving foot sloggers of his Volksgrenadier elements with his faster
moving motorised Panzergrenadiers.
To make sure things
run smoothly, von Green will need to spend alternate turns (phases) with each
of the German players, using his leadership influence to keep things moving.
(Either the Volksgrenadier
or Panzergrenadier player, keeps the initiative next turn with 2 or more x 6’s
rolled on the CoC dice, when the KG leader is allocated to that particular player).
KG von Green needs to be activated on a
4 with one of your command dice each phase if you wish to use his leadership.
The faster moving
Panzergrenadiers must enter the table by road or rail, whilst still mounted in
their halftracks. Once the troops dismount, von Green will have no influence
over them as they will not be in contact with the vehicle radio and so, only be
controlled by the platoon command dice.
You have the option of sending two teams (one for each
player) of INFILTRATION COMMANDOS ahead to cause disruption and confusion with
the enemy by preventing enemy support elements from arriving on the table by the
road your commandos are occupying. Each German player needs to allocate a full
CoC dice to activate his commando team.
Although you have a lot of support options at your disposal,
you may find you are limited in what you can control in each phase with only 5
x command dice (plus von Green’s 3 x vehicle activations every other phase).
“Soldiers of the West Front! Your great hour has arrived.
Large attacking armies have started against the Anglo-Americans. I do not have
to tell you anything more than that. You feel it yourselves.
WE GAMBLE EVERYTHING!
You carry with you the holy obligation to give everything to
achieve things beyond human possibilities for our Fatherland and our Fuhrer!”
Field Marshal Gerd von Rundstedt, German Commander-in-Chief
in the West, 15 December 1944


