Friday 25 January 2013

Medieval Terrain for War of the Roses game


I don't get to play very often but as I have the day off from work on Monday my mate is coming over for a game. I am going to try and sort some rules out for a War of the Roses game, adapting Too Fat Lardies 'Sharp Practice'.
I have just set the table up ready for Monday using some of the terrain I recently made. There is probably a little too much clutter for a game but I just fancied getting some of the new stuff on the table.
There are a couple of commercial buildings on the table and the stream section and the hill with the road running through it are from 'Last Valley' which I have re-painted and flocked to match my terrain.
Don't look to close at the figures as they were painted a while ago using Army Painter and there was a lot of experimenting with different colours for this method.


I will post some pictures of the game at some point in the future.

Friday 18 January 2013

Ploughed Fields & Allotments


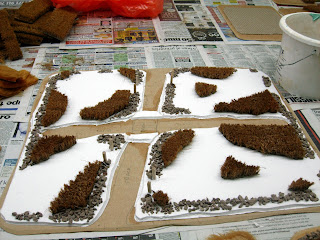
Yet more terrain this week with ploughed fields and allotments.
I used corrugated card with the top layer of paper peeled away from the card and then glued this to a base. Then 'tile grout' spread over the edges of the card to blend it in with the rest of the base and when dry, white glue and sand for texture. See previous posts for painting terrain.
The allotments were card as above and just a couple of layers of small stones glued around the edges. The walls could have done with being a bit higher but I have misplaced my big bag of stones at the moment.
Make sure each layer of stones is left to dry overnight before glueing the next layer.


Saturday 12 January 2013

Making Haystacks whilst the sun shines.


Following on from last week, I am going to show you how I make Haystacks, the main item you need is a doormat and plenty of sunshine.

HAYSTACKS.
Cut two pieces of doormat to the size you want the height of the haystack to be. Glue them back to back with white glue and then glue onto a suitable base with white glue.

Then you cover the base in glue and sand and paint this and the rubber backing of the doormat in dark brown or whatever dark colour you use for your first layer of basing.


You then drybrush the base a lighter shade of earth colour and use the same colour to lighten the rubber backing on the mat.

You will need to cut a pile of mat away from the rubber backing.The way I do this is by cutting the mat into very thin strips with a craft knife and then hold the strips over a tray and cut as close to the rubber as you can with a pair of scissors to 'make hay'. (If the strips are too thick you will find they are difficult to cut.)


You then cover the whole mat in watered down white glue and then cover with your hay cuttings. When dry I gave the haystack another layer of glue and cuttings.


When fully dry I paint the haystack by drybrushing a couple of lighter colours. I used household paint, dark yellow and then a lighter brush over with mid yellow. (I use this colour for all my wheat fields)

Having experimented making these, I think you could make them a lot quicker by not bothering to even paint the base, as the haystack ends up more or less covering the whole thing.

Cheers,

Pat.


Friday 4 January 2013

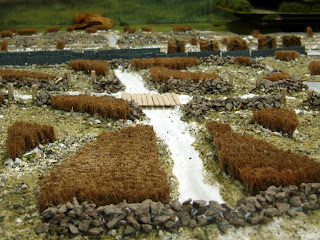
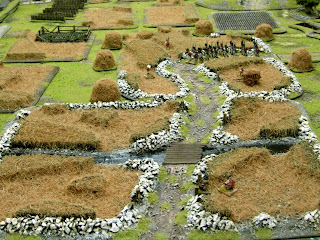
LARGE WHEATFIELDS


During the month of December I spent most of my spare hobby time making a varied amount of terrain. There is some for the Medieval period and Afghanistan/Sudan but the majority of it is quite versatile for most periods.
Here is the first batch that I will be showing, which are a couple of large wheatfields or a series of wheatfields if you like, each on a large base.
The first one I have is a bend in a road running through a series of fields, bordered with stone walls and a few gate opening's.
The second base is again a track running through a series of fields but there is also an irrigation ditch with a small wooden bridge running over it.
Both of these fields link together quite nicely to form a larger area.

Materials used.
Hardboard
Doormat
Small stones from the garden centre (for the walls)
Tile Grout
Balsa Wood
PVA Glue
Sand and small ballast.
Household Paint.


The water effects could do with a couple of more coats of gloss varnish as they have only had the one coat.

More terrain to come next week.