

My mate John Warren came around my place today for a game of Chain of Command. I based the scenario from one of the WW2 campaigns out of the 'Too Fat Lardies' Summer Special with a few alterations to suit this game.
I gave John the option of which side he would like to play and even though the defending British were heavily outnumbered with about half the support points of the attacking German, he opted to play British, like the true patriot he is.
EARLY WW2 GAME.
DEFENDING BOULOGNE 1940
A fighting withdrawal and the evacuation of Dunkirk.
SCENARIO FOUR: A DELAYING ACTION.
Defending Boulogne
BRITISH BRIEFING
You have just arrived in Boulogne and marched
out to the edge of the town to take up defensive
positions there. It's been a long, hard day getting
everything into position and digging in.
Unfortunately you have neither wire nor mines to
strengthen your position, but your men are in
good spirits and ready to face the Boche.
Your orders are to hold Boulogne, but you have
insufficient men to really defend such a large
area. What is more, a lack of motor transport
means that if you are pushed back from your
current positions you will have to abandon your
anti-tank guns. You have been told that a British
Armoured force will be joining you tomorrow
from Calais where it is currently disembarking
and that a Rifle Corps battalion will strengthen
your defences. When they arrive this should be a
rather fairer fight!
Your force is as follows:
Command Dice: 5
Quality: Regular
PLATOON HEADQUARTERS
Lieutenant, Senior Leader, with pistol
Sergeant, Senior Leader, with rifle
2” MORTAR TEAM
2” mortar with two crew
BOYS AT RIFLE TEAM
Boys AT rifle with two crew
Sections one to three.
th3SECTIONS ONE TO THREE
Corporal, Junior Leader, with rifle
LMG TEAM RIFLE TEAM
Bren gun with three
crew
Four riflemen
BRITISH SUPPORT LIST
LIST ONE
Medical Orderly
Adjutant
Entrenchments for one Squad
LIST TWO
Roadblock
Boys AT rifle Team, 2 men THREE
2 pounder Anti-Tank gun with five crew and
Junior Leader
Vickers MMG on tripod mount, 5 crew
LIST FOUR
Car
The British used a number of French civilian
vehicles in Boulogne. One of these may be
pressed into service to carry one Team.
You have to spend one activation each turn to get the car started, rolling a 6, then 5,6 and so on.
Roadblock
Most of the roadblocks used around Boulogne
itself were improvised, being either piled up
furniture or disabled vehicles. These may be
cleared by any German Panzer pushing against
them and moving through them at the rate of
1D6 per turn during which time the AFV may not
fire or undertake any other actions. Infantry may
cross a roadblock by treating it as a major
obstacle
Mark VI and a Matilda Mk11 can arrive on turn 2
Mk VI has to arrive first.
GERMAN BRIEFING
You have crossed all of France in the past ten
days! It seems that the enemy are unable to
stand before our Panzers and now you are racing
towards the Channel Ports to crush the arrogant
English who are falling back to the coast. If they
escape behind the "wooden walls" of the Royal
Navy they will always remain as a threat to peace
in Europe. You cannot allow them to escape.
Before you lies Boulogne. If you can capture the
port you will deny your enemy the escape route
he will so badly need. However, Luftwaffe
reconnaissance planes report that the enemy are
landing troops even now. If you delay for even
an hour the enemy will get stronger and the
reality is that your panzers are weak through
losses caused simply by break downs. You must
push on with all speed to seize the port and trap
the English!
Your force is as follows:
Command Dice: 5
Quality: Regular
PANZER PLATOON HEADQUARTERS
Lieutenant, Senior Leader, with pistol
Feldwebel, Senior Leader, with SMGTRUPP
GERMAN PANZER SUPPORT LIST
LIST ONE
Medical Orderly
Adjutant
LIST TWO
Le.GrW36 5cm mortar Team, 3 men
T THREE
Squads one to Four
Junior Leader, with rifle
LMG TEAM three crew
RIFLE TEAM six riflemen
Panzerbusche 38/39 Team, 2 men
Flamethrower team of three men
MG 34 on tripod mount, 5 crew
PaK36 36mm ATG with 5 crew and junior leader
IST FOUR
Panzer I with Junior Leader
IST FIVE
Panzer III with Junior Leader
Pz.IV A with Junior Leader
Pz. 38(t) with Junior Leader
I have upped the support points quite considerably with the attacking Germans on double the amount. This gives plenty of options for the players but with only 5 x command dice each, it still limits how much you can control in a phase and loss of morale will still be the deciding factor.
For playability and a longer game, both sides have been given a force morale of eleven.
I could have played this as a 'BIG CoC' game with an increased amount of dice to control the extra support units but I think this would have given the attacking German player too much of an advantage with all those extra support points but this way he had the flexibility of units but had to keep an eye on his morale.
You will have to excuse the blurry photos as they were a bit rushed in trying to get the balance right in taking pictures and not slowing the game down.
We carried out the Patrol phase and deployed our Jump Off Points followed by John then placing his road block and entrenchment on the table.


John had placed the entrenchment in front of the Chateau to take advantage of the open killing ground in front of him and had filled this with his first squad which he placed on 'over watch'.
I had started my deployment by bringing on some armour for my first couple of turns with a Panzer I and Panzer III on the German left flank.

I also had a Jump Off Point a good way up on my left flank and I was able to deploy my first infantry squad out of line of sight of the Brits on 'over watch'.


The Chateau dominated the centre of the table and so John decided to deploy a second squad in its grounds.


John had positioned his Mk VI to cover his right flank and watch out for any German units that were tempted to pop their heads around the corner of the Chateau grounds.
I pushed my first infantry unit up along my left flank with the Panzer I in support and placed my LMG team in the entrance to the alley way so that they could fire down the flank of the Brits in the entrenchments.


The Brits in the trench finally broke, with the junior leader being the sole survivor.

I pushed my first infantry squad on and into the rear gardens of the Chateau but they could not advance any further at this stage as the Brits had a full squad in the upper windows of the building on 'over watch'.


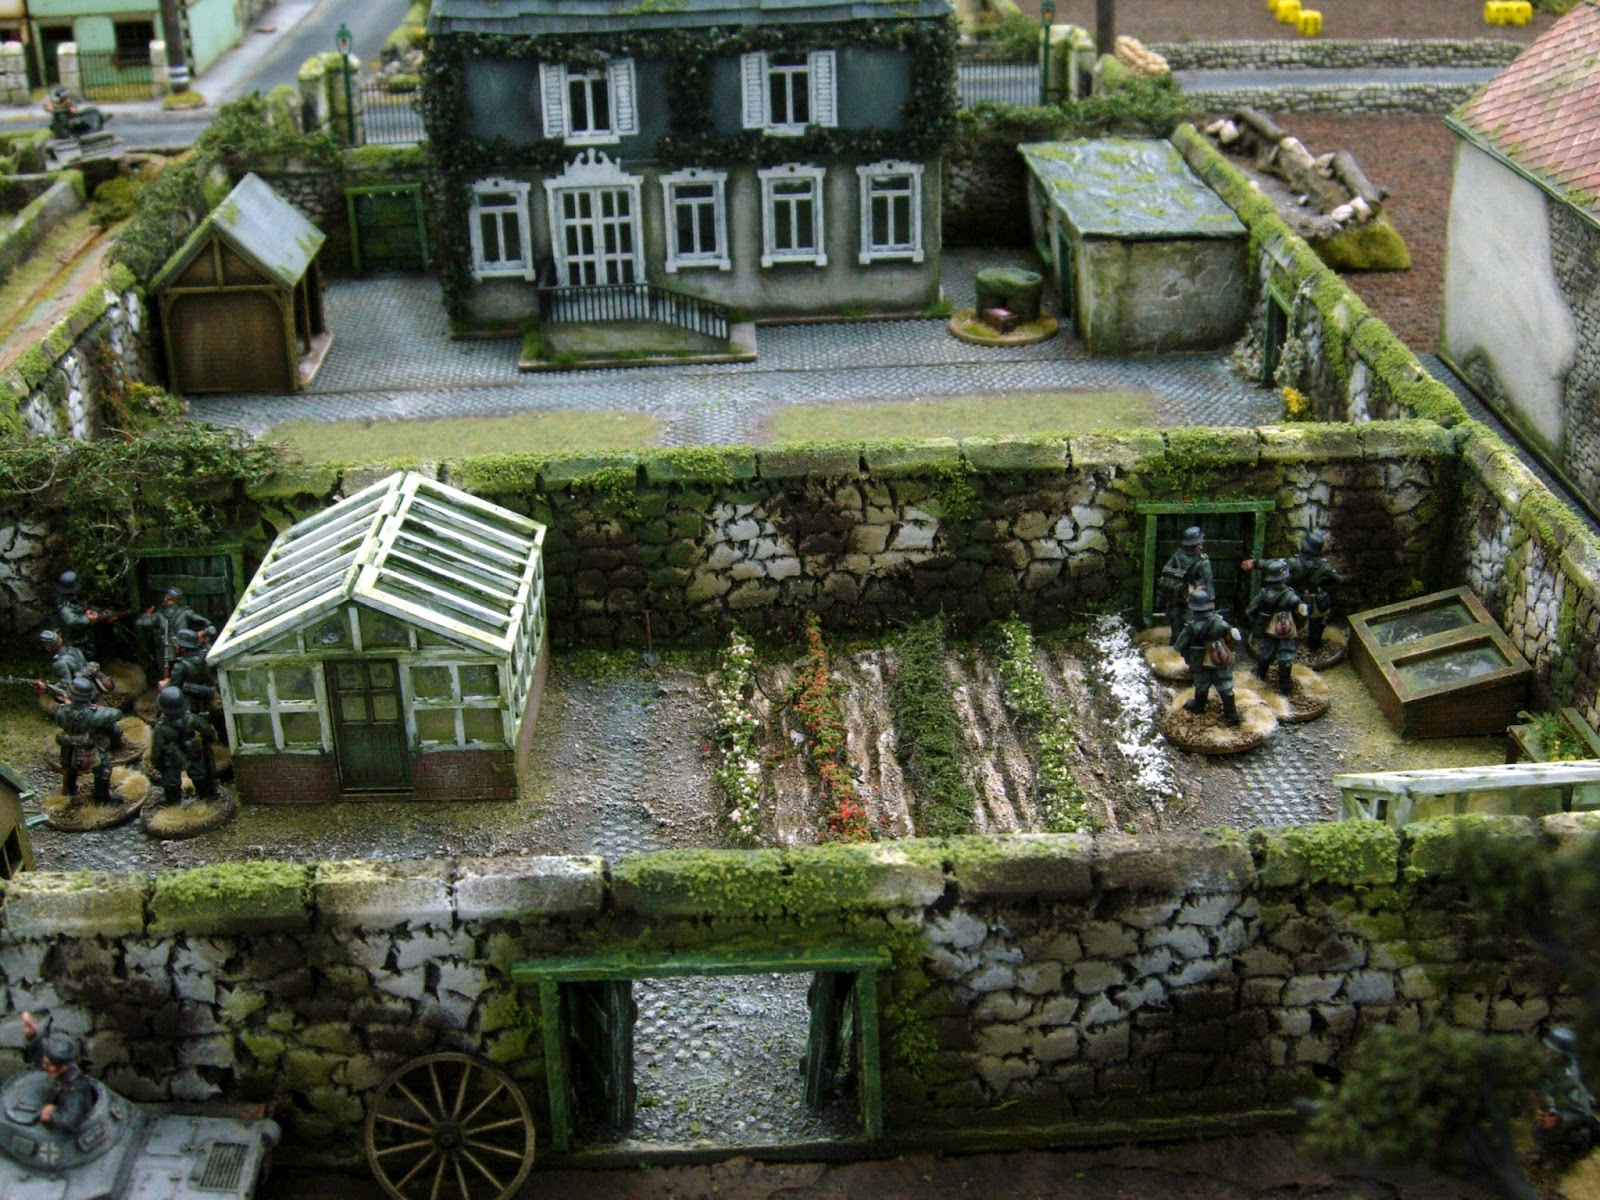
Meanwhile, in the centre, my second squad crossed the hedge line and started advancing across the open ploughed fields, with the Panzer III giving support.

The Panzer III coming forward had the desired effect of the Brits deploying their 2 pounder ATG in the grounds of the church yard on their left flank and having a pop at the PanzerIII across the fields. Luckily for me, the shot went wide.

John also had another squad of British infantry in the church and his bren team opened up on the second German infantry squad that was in the middle of crossing the open field. Again, unlucky shooting for the Brits, with no casualties and I was able to get to the safety of the far stable wall by rolling a double six and getting two turns in a row.

I was able to concentrate my fire on the church with the mortar team and a MMG team that I had brought onto the table and was now lining the hedge. I also brought a third infantry squad on my right flank and advanced them towards the British ATG in the church grounds.


The German right flank, with the support of a senior leader and covering fire from the mortar and MMG were able to wipe out the crew of the ATG, drive out the remaining infantry from in the church and end the turn with a CoC dice to capture a British jump off point.
Meanwhile, in the centre, the second squad had advanced on the wounded British junior leader and captured him. The Panzer I had also changed direction and had moved across from the left flank and was now heading for the centre of the table.


The British squad in the chateau had also taken some casualties and decided to pull back and evacuate the building. This meant leaving their Jump Off Point, which the Germans were able to occupy and then again end the turn with another CoC dice.
The British morale was getting very low by this stage and they were down to just two command dice but they had also given the Germans a bloody nose with their morale now reduced to five.


It is the first time I have played an early war game and it was great fun, with the AFV's not being the all powerful battle winning tanks that you can get in the later part of the war. The Panzer I for example not having any AP capability, with only a couple of MG's and an armour rating of 2.
FANTASTIC table, one of the best I've ever seen!
ReplyDeleteI'll second that - a lovely table, and a good report...
DeleteThat really is outstanding. So impressive!
ReplyDeleteOutstanding stuff Pat! Boy the Jerries put some hurt on the Tommies ... but at least they put a good sized hole in that Panzer III :-)
ReplyDeleteWonderful table, miniatures, vehicles and report Pat. Wheeling out CoC tomorrow night at the club so this AAR was very handily timed mate.
ReplyDeleteJust superb, it was like watching a movie!
ReplyDeleteSlendid, I like. It's crazy.... ;-)
ReplyDeletefantastic
ReplyDeleteYour gaming table is a real inspiration. Got a couple of ideas just looking at it. Great game, and yes it is fun to play early war. My favourite WWII period
This looks so awesome Pat! Extremely well done.
ReplyDeleteA new gem out of your magic chest...fantastic pictures, atmospheric and gorgeous!
ReplyDeleteThanks chaps. Apologies for some of the briefing was cut and paste and having just read through it again I can see a few mistakes but it will have to stay as it is.
ReplyDeletePat fantastic looking game as always...
ReplyDeleteIt looked like the Brits were having a tough time of it.
Cheers
Stu
Great looking game Pat! I love the early war as well - where did you get the figures from?
ReplyDeleteThanks Pat, Warlord and Wargames Foundry.
DeleteExcellent looking game! Such an inspiration. I'm very interested in learning more of that flexible muddy road. It looks great!
ReplyDelete/Mattias
Wow! Fantastic looking game Pat! As always very inspiring!
ReplyDeleteChristopher
Stunning table, looks superb!
ReplyDeleteExcellent...really enjoyed that!
ReplyDeleteFantastic game table, really wonderful, and very nice game too.
ReplyDeleteWhat a fantastic gaming table! Enjoyable report. Early War is also my favorite time period as indeed the armour isn't all powerful. Thanks for posting it!
ReplyDeleteSplendid AAR!!!
ReplyDeleteIndeed stunning gaming pictures!!!
Once again lots of pictures to view your excellent Terrain, Figure and game.thanks for sharing Pat.
ReplyDeleteGreat looking game.
ReplyDeleteThanks again chaps.
ReplyDeleteA very nice and interesting report. Sounds like a good day to me!
ReplyDeleteBut the table... Kudos!
Honestly I could spent hours with browsing through the pictures. The composition of the scenic pieces and their sheer quality is really beyond comparison.
This marvelous absolutely marvelous.
ReplyDeleteMakes me want to break out the 28mm WW2 kit and play!
More please
Magnificient looking game! Simply can't stop drooling over the fantastic pictures! That's pure wargames porn at its best.
ReplyDeleteA Splendid Table Top. Must feel good knowing all the enjoyable work producing it has paid off, Congratulations to all who had a hand in echieving such a delight. Beano Boy
ReplyDeleteThat is just the most magnificent things I have seen in this wonderful hobby of hours.
ReplyDeleteThink it has just derailed my plans for what I am going to work on for the Christmas break. Looks like I am back into WWII terrain and feeble attempts to get it looking half decent.
Thanks for showing this
Richard